Paper Folding
The Turn-Style Fold
The Turn-Style Fold adds dimension and a feel of motion to projects. You can use paper that will give your repetitive patterns or not. This fold is very diverse.
Supplies Needed:
- Eight 2" squares of 2 sided paper (not cardstock)
- Liquid Adhesive (such as Liquid Glass, Diamond Glaze or Delta's liquid Archival glue)
- Bone Folder (not necessary but quite handy with the double folds)
The Folding
Step OneCut out all eight of your 2" squares. Place the square print side (side you want to show) down.
Step Two
.jpg)
Fold the bottom edge up to the top. (fold will be at the bottom & you will now see the side you want to show)
Step Three
.jpg)
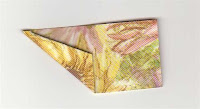
Fold the Bottom left corner (folded edge) up to the top. This will form a triangle flap. Use the bone folder to flatten fold. Once flattened re-open the fold into the original position.
Step Four
.jpg)
Fold the bottom left corner edge up to meet the crease line created in step #3. Use your bone folder to flatten the fold.
Step Five
.jpg)
Fold the flap up along the crease line you created in step #3 creating a double fold.
Step Six
Repeat these steps until all eight of your squares are folded.
Putting It All Together
.jpg)
Step One
Position the piece horizontally and put a small amount of liquid adhesive on the lower right side of the folded corner.
.jpg)
Step Two
Place the second piece on top of the first lining up the flat edge of the folded edge of piece #2 to the right edge of the folded edge of piece #1. Repeat this step for the first 6 pieces.
The last two pieces remaining back end will need to be tucked under piece #1 (see image below)
.jpg)
Idea's
- Try doing this folding technique and keep a repetitive pattern throughout the finished element.- Alter colors: Make 4 of the 8 pieces one color and the second 4 different colors. Create patterns with the colors.
- Enlarge the square to 3" or larger and use on a scrapbook page.
- Reduce the square to 1" and use on an ATC or Alterd Book project. Note: folding is a challege at this size for large hands.


.jpg)
.jpg)
.jpg)

2 comments:
great directions!
stampez - Thanks I find the more you can explain it with fewer words the better. I truly enjoy paper folding techniques of all sorts. Nina
Post a Comment