

 These two pages I did using an adapted layout from Close to My Hearts Imagine layout book
Papers were supplied by Memory Works Consultant Deborah Cariker for her design team kit.

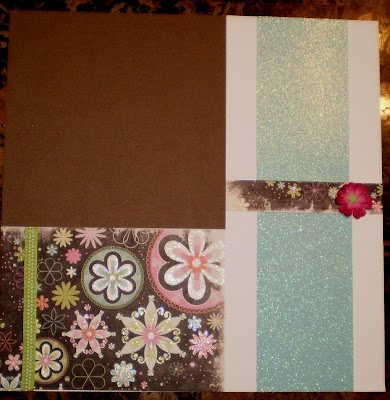 These two pages are also from Deborah Cariker Memory Work kits. They will be used toward my friends Christmas Album surprise Gift.
All four pages counted toward my Personal Challenge. I'm really making some head way and getting through my mounds of photos by simply making a personal challenge like I did. Of course it helps to have a dedicated day each week for scrapbooking. However, I will not be able to attend for the next 3 weeks....Oh what will I do?


 I added puffy paint to the gingerbread guys and tree to give them some dimension. All six of the layouts are from Jeanette Lynton's layout books. I choose (3) 2 page layouts that worked well together. I then laid out all the paper I wanted to use and spec'ed out how it would all pull together.
 So this is the first Version of this card. I have a total of 8 cards and I'm doing 2 of each Version. I will share them with you and I get them done. This is mounted on a white card base with a 1/4" white border left all around. Here it just blends into the background. I used the Cuttlebug Embossing folder for the background. The Coffee Mug was not altered at all and is a die cut from my "Big Baby" The inside of the Mug is adapted from the froth cut for inside the cup of hot coco. There are no changes in the steam other than I adhered it facing the right because to the left it looked like a ? mark to me. I found a Scalloped circle cut that had 4 nesting's and I simply sized this one to fit exactly behind the mug to better distinguish between the background and the inside of the mug (see I did these separate from each other so they I didn't have the for site to make them different colors)

 On both pages I used some
  Up until this point I used all older items I had already purchased. For this panel I did a search online for a poem about bathing babies and the water drop image. I then downloaded the image and pasted it on a word document in color and then placed the poem on top of it in full black. I then mirror printed it onto some Make Your Own Rub On Sheets that I got as an RAK from a Friend. This was so much fun to do.Fast and surprisingly Easy!


 The October Title and photo matt on this first page was created by Lelia> I simply matted the title using some


