or this isn't your grandmothers shaker card
Well how do you name a tutorial like this one? Essentially you’re making a shaker element for a card but instead of shaking it you would be squishing it.
Supplies:
.jpg)
Cricut or other tag template where you can have an open center
Styling Hair Gel
Plastic card Confetti aka sparkly confetti
Mini zipper top baggies
Liquid glass or other liquid glue and tape adhesive
Pop Dots or 3D Strips
Craft Knife & Paper Scissors
Crop-a-dile or Hole Punch
Cardstock
Step One:
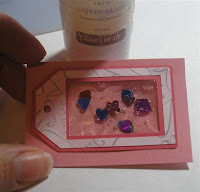
Using your Cricut or other tag template system create a tag with a window that matches the width of your zipper top baggie. (ie in the sample I’ve shown I am using the Cricut Doodle Type cartridge’s in shadow at 2.5” and then the upper layer in without the shadow still at 2.5”) Cut as many as you will need for your finished product. If you did make a overlay piece you will need to adhere this overlay (light pink in photo) to the tag making sure that the holes of the tag match up as well as the window.
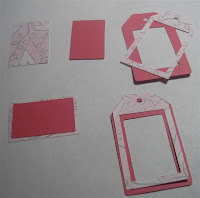.jpg) What is nice you will have all these inside pieces to use on this project or on another project already cut out for you.Step Two:
What is nice you will have all these inside pieces to use on this project or on another project already cut out for you.Step Two: 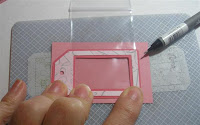.jpg)
.jpg)
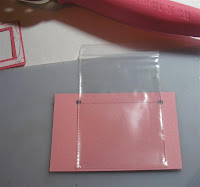
Now you will cut out a piece of cardstock slightly larger than your tag window. This I am calling my Tag Mount. In the sample I’ve shown my Tag Mount size is 3”x2”. Now measuring your tag with the zipper top baggie between it and the Tag Mount find the size just inside the window of the tag. This is going to be your zipper top baggie mounting mouth. Using your craft knife carefully make a cut for this mouth.
.jpg)
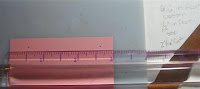
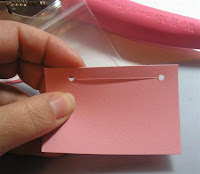
Using your crop-a-dile make a hole at each end (double check you don’t go outside the tag measurement so it does not show from the front). This hole helps the sides of the cardstock from ripping when the gel element is being squished.
.jpg) In this image you can see how the holes you made are still very tight to the edge of the zipper top baggie.Step Three:
In this image you can see how the holes you made are still very tight to the edge of the zipper top baggie.Step Three: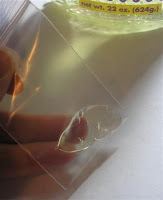.jpg)
.jpg)
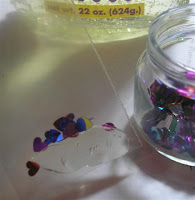
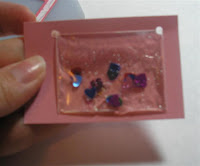
Now the fun part starts. Open your zipper top baggie and drop two glop’s of the hair gel into the bottom of the baggie (try not to get any onto the upper edges or sides of the baggie) These glop’s only need to be the size of a dime each. You will then add a pinch or two of your plastic card confetti into the baggie. Gently mix keeping the mixture to the bottom of the baggie. Press out all air and zip the seal shut. Get all the mixture to the very bottom of the baggie.
.jpg)
.jpg) Step Four:
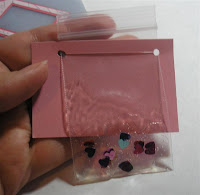
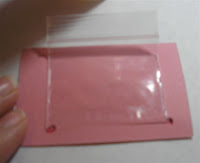
Step Four:Feed the zipper top baggie through the tag mounts slit. You need to position it so that it is hidden completely by the tag itself when placed on top of the baggie. Once the positioning is adjusted using your liquid Glass add a few dabs under the baggie to adhere it to the Tag Mount. The nice thing about using clear liquid glue is that you can not see it through the window and baggie contents. Turn the tag mount over and press the flap of the
.jpg)
baggie that does not have any gel in it to the back side of the mount and adhere similar to doing the front side. There will be the zip part of the bag extending over the tag mount’s back side. We will deal with this in a bit.
.jpg)
.jpg) Step Five:
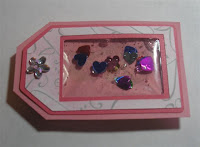
Step Five:Now it is time to trim the tag mount down to just larger than your actual tag. The tag mount now only looks like a matted background piece to your tag gel window. Make sure you do not cut the zipper top baggies zip top portion that is left loose. Now turn over the whole structure. Fold the loose portion of the baggie into the center of the tag, using your clear liquid glue apply a small amount under the flap and glue it back onto itself. Use your
pop dots 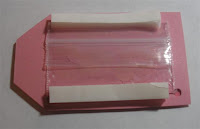.jpg)
or 3D strips just along the edge of the baggie for final mounting as well as to help hold the edge of the zipper top baggie to the mount.
Now you can use your gel tag element on any project.
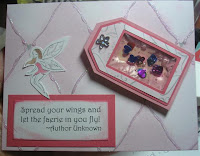.jpg) Product I used was:
Product I used was:Background & Texture Paper: The Paper Studio
Cardstock: Close To My Heart
Liquid Glass: Close To My Heart
Flower Jewel: Close To My Heart
Quote Stamp:
Purple Faerie Paper CraftsFaerie B Stamp:
Purple Faerie Paper CraftsSparkly Glitter Glue: Purple Faerie Paper Crafts


.jpg)


.jpg)
.jpg)
.jpg)
.jpg)
.jpg)
.jpg)
.jpg)
.jpg)
.jpg)
.jpg)
.jpg)
.jpg)
.jpg)
.jpg)
.jpg)


.jpg)