
These layouts are also for my "Special Christmas Present" Project.
The Yellow paper is from CTMH Duo Background & Texture paper (using the back side) The Blue water like paper is actually from Fiddlerz 3 Valentine/Love Series
I used a Layout from
PageMaps For the first page and then mimicked it in reverse for page 2.

This title I got from a piff I snagged on the Scrapbook Place. To Jazz it up I simply added some Diamond Glaze to it.

This photo matt was from that same piff. Here I cut the faux ribbon to the right created a matching matt out of the blue Fiddlerz 3 paper tucking it under the cut faux ribbon. I again added some Diamond Glaze and then surrounded it with buttons etc.
 On this shoreline portion of the layout I used a combination of buttons, Chipboard Die cuts, Die cuts with bubble sticker on them and these stone like embellishments I got from another snag on Scrapbook Place.

Page 2
I had two totally different suns to use and I simply cut one out and layered it on top of the other. It turned out nice I think. I used a stitched panel I got from Linda Weber on Scrapbook Place here as well for the Fun in the Sun Vellum panel. The stitched ribbon was also a snag. Wahoo nearly a fully traded out 2 page layout. The only thing I used Cash to purchase was the Yellow CTMH paper I used for the back ground and even that is from like 2006 so totally a left over from another project item.


 These two pages I did using an adapted layout from Close to My Hearts Imagine layout book
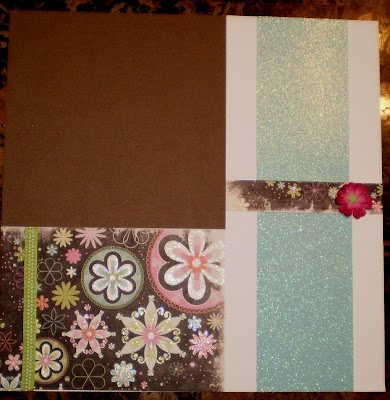 These two pages are also from Deborah Cariker Memory Work kits. They will be used toward my friends Christmas Album surprise Gift.


 I added puffy paint to the gingerbread guys and tree to give them some dimension. All six of the layouts are from Jeanette Lynton's layout books. I choose (3) 2 page layouts that worked well together. I then laid out all the paper I wanted to use and spec'ed out how it would all pull together.
 So this is the first Version of this card. I have a total of 8 cards and I'm doing 2 of each Version. I will share them with you and I get them done. This is mounted on a white card base with a 1/4" white border left all around. Here it just blends into the background. I used the Cuttlebug Embossing folder for the background. The Coffee Mug was not altered at all and is a die cut from my "Big Baby" The inside of the Mug is adapted from the froth cut for inside the cup of hot coco. There are no changes in the steam other than I adhered it facing the right because to the left it looked like a ? mark to me. I found a Scalloped circle cut that had 4 nesting's and I simply sized this one to fit exactly behind the mug to better distinguish between the background and the inside of the mug (see I did these separate from each other so they I didn't have the for site to make them different colors)

 On both pages I used some
  Up until this point I used all older items I had already purchased. For this panel I did a search online for a poem about bathing babies and the water drop image. I then downloaded the image and pasted it on a word document in color and then placed the poem on top of it in full black. I then mirror printed it onto some Make Your Own Rub On Sheets that I got as an RAK from a Friend. This was so much fun to do.Fast and surprisingly Easy!


 The October Title and photo matt on this first page was created by Lelia> I simply matted the title using some


